
Local agent clients के लिए reproducible builds
Reproducible builds local agent client binary को reviewed source, documented macOS build recipe, signed tags और verifiable artifacts से जोड़ती हैं।
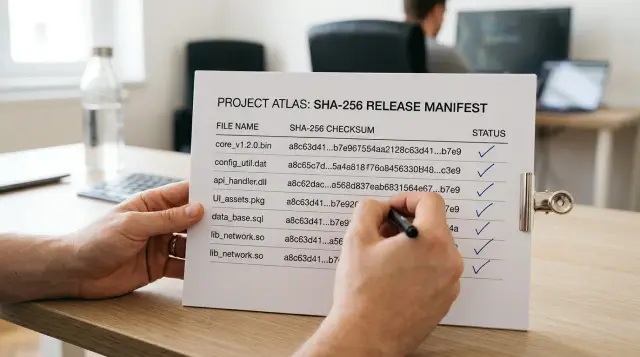
एक local agent client उन credentials और अधिकारों के बहुत करीब काम करता है जो महत्वपूर्ण हैं। अगर कोई developer उसे डाउनलोड करके API accounts या SSH destinations का access दे देता है, तो release binary की जाँच केवल हरे रंग की CI job के screenshot से कहीं अधिक गंभीरता से होनी चाहिए। असली सवाल सीधा है: क्या कोई इस exact executable को उस source से जोड़ सकता है जिसकी उसने समीक्षा की है और ऐसी build procedure से, जिसे वह फिर से चला सके?
Reproducible builds इस सवाल का एक हिस्सा हल करते हैं। वे malicious commit को harmless नहीं बनाते और compromised developer account को सुरक्षित नहीं बनाते। वे reviewed source और shipped code के बीच मौजूद एक अलग, आम अंतर को कम करते हैं। इसी अंतर में बदला हुआ build worker, बदली हुई dependency या स्थानीय स्तर पर हुआ अनजाना बदलाव छिप सकता है।
Sallyport जैसे local agent client के लिए यह इसलिए महत्वपूर्ण है क्योंकि app credentials को agent process से बाहर रखते हुए कार्रवाइयाँ करता है। Readers को उस boundary को संभालने वाले code की जाँच करने और यह तय करने में सक्षम होना चाहिए कि किस release binary में वह code मौजूद है। उन्हें केवल release page पर भरोसा नहीं करना चाहिए।
Signed download यह साबित नहीं करता कि reviewed source से वह बनी है
Signature यह साबित करता है कि signing identity रखने वाले व्यक्ति या सिस्टम ने delivered bytes पर हस्ताक्षर किए। यह साबित नहीं करता कि वे bytes उस repository commit से आए हैं जिसकी आपने समीक्षा की थी।
Teams अक्सर इन दोनों दावों को एक मान लेते हैं, क्योंकि macOS पर दोनों भरोसा दिलाने वाले dialogs दिखाते हैं। Gatekeeper और system signature checks यह बताते हैं कि bundle की signing chain valid है और signing के बाद उसमें बदलाव हुआ है या नहीं। वे यह नहीं बताते कि signer ने tag v1.2.3 को local patches के बिना build किया था, CI ने malicious dependency इस्तेमाल नहीं की थी, या release uploader ने publish करने से पहले archive को बदल नहीं दिया था।
यह अंतर incident की जाँच का तरीका बदल देता है। अगर app की signature valid है, लेकिन उसका व्यवहार अनपेक्षित है, तो signing identity उन लोगों और systems का दायरा सीमित करती है जो उसे बना सकते थे। Reproducible build उस source और recipe का दायरा सीमित कर सकती है जिससे executable बना। आपको दोनों तरह के सबूत चाहिए, क्योंकि वे अलग-अलग failures को कवर करते हैं।
Apple के code-signing documentation में signature को code bundle पर लगी मुहर बताया गया है। यह वर्णन सही है, लेकिन मुहर यह नहीं बताती कि bundle किस kitchen में तैयार हुआ। Code signing को distribution integrity और publisher identity मानें। Independent rebuilding को source-to-binary verification मानें।
कोई release reproducible होते हुए भी खतरनाक हो सकती है। अगर reviewers ने खराब बदलाव स्वीकार कर लिया, तो clean rebuild उसी खराब program को ठीक-ठीक बनाएगी। Reproducibility को review, protected release permissions या समझदार credential design का विकल्प न बताएं। यह केवल source से artifact तक के रूपांतरण की अनिश्चितता दूर करती है।
Bytes की तुलना से पहले claim तय करें
Team को साफ़-साफ़ बताना चाहिए कि क्या match होना है, क्योंकि macOS release packaging में signing के बाद पूरे bundle की तुलना अक्सर संभव नहीं रहती।
सबसे मजबूत claim bit-for-bit reproducibility है: दो independent builds बिल्कुल समान bytes बनाएँ। Unsigned command line executable, source archive या deterministic package के लिए यह अच्छा लक्ष्य है। लेकिन जब release pipeline signing timestamp, provisioning profile, notarization ticket या generated installer image शामिल करती है, तो स्थिति जटिल हो जाती है।
Comparison छोड़ देना इसका समाधान नहीं है। Release को stages में बाँटें और claim को सटीक बनाएं। एक व्यावहारिक release contract ऐसा हो सकता है:
- Signed Git tag source commit की पहचान करता है।
- उस commit से बना unsigned application bundle byte for byte match होना चाहिए।
- Release signer बाद में घोषित signing identity और entitlements जोड़ता है।
- Published archive में documented signed bundle होता है, जिसका executable hash unsigned comparable output से match करता है।
यह CI ने app बनाई, जैसे अस्पष्ट statement से अधिक कड़ा है और complete identity का दावा करने से अधिक ईमानदार है, जब signing के कारण वह हासिल नहीं की जा सकती। यह reviewers को उन फ़ाइलों तक भी ले जाता है जो execute होती हैं। अगर application executable अलग है, तो matching disk image बहुत मददगार नहीं है। बदले हुए entitlement के साथ matching executable तुरंत ध्यान देने योग्य है, क्योंकि entitlements process को मिलने वाले अधिकार बदल सकते हैं।
एक और अंतर स्पष्ट रखना चाहिए: deterministic builds और verifiable releases एक चीज़ नहीं हैं। एक build किसी मशीन पर deterministic हो सकती है, क्योंकि वह चुपचाप local cache, current time या developer setting पढ़ती है। Verifiable release में इतना evidence होता है कि कोई दूसरा व्यक्ति वही inputs प्राप्त करके claim test कर सके। दूसरी requirement उन assumptions को सामने लाती है जिन्हें पहली छिपा सकती है।
पहली public verification request से पहले repository में claim लिखें। अगर maintainers यह नहीं बता सकते कि comparison signing से पहले होती है या बाद में, तो बाहर के reviewers mismatch का अर्थ नहीं समझ सकते।
Release record को source, recipe और artifact को जोड़ना चाहिए
Release record में signed source reference, immutable recipe और लोगों द्वारा download की जाने वाली फ़ाइलों के digests होने चाहिए। इनमें से किसी एक को छोड़ देने पर evidence chain टूट जाती है।
Release का नाम बताने वाले annotated Git tag से शुरुआत करें। केवल commit hash release statement नहीं है, क्योंकि कोई भी web page को किसी commit की ओर point कर सकता है। Tag पर ऐसी maintainer identity का signature होना चाहिए जिसे contributors verify करना जानते हों। इसके बाद केवल छोटा identifier नहीं, पूरा commit object record करें।
एक छोटा manifest plain text में रहकर भी उपयोगी evidence दे सकता है:
release: 1.2.3
source_tag: v1.2.3
source_commit: 4f3c1b6e8a0d2c7f9b5e1d4a6c8e0f2b3d7a9c1e
build_recipe: docs/release-build.md@4f3c1b6e8a0d2c7f9b5e1d4a6c8e0f2b3d7a9c1e
xcode: 16.2
macos: 15.2
architecture: arm64
unsigned_app_sha256: 9b74c9897bac770ffc029102a200c5de6f6d2f9a4b9e8c1d2f3a4b5c6d7e8f90
published_archive_sha256: 2cf24dba5fb0a30e26e83b2ac5b9e29e1b161e5c1fa7425e73043362938b9824
ऊपर दिए गए hashes केवल format का उदाहरण हैं। असली manifest में पूरे वास्तविक digests होने चाहिए और manifest पर fresh signature या उसे शामिल करने वाले signed release tag का इस्तेमाल होना चाहिए। Hash को केवल उसी web page पर न रखें जो download host करती है। जो attacker archive बदल सकता है, वह page भी बदल सकता है।
Build recipe में केवल compiler का नाम पर्याप्त नहीं है। उसमें Xcode release, SDK selection, architecture, dependency resolution method, build configuration, code-generation tools, output को प्रभावित करने वाले environment variables और archive package करने वाली command का उल्लेख होना चाहिए। अगर release के लिए private compiler plug-in या manually downloaded binary blob चाहिए, तो यह भी बताएं। चुप्पी हर बाहरी verifier के लिए missing input को dead end बना देती है।
Developers साधारण Git tooling से source binding जाँच सकते हैं:
git fetch origin tag v1.2.3
git tag -v v1.2.3
git rev-list -n 1 v1.2.3
git show -s --format=%H v1.2.3
पहली verification command tag object और यह बताती है कि locally trusted public key का इस्तेमाल करके Git उसकी signature validate कर पाया या नहीं। आख़िरी दो commands को वही पूरा commit hash दिखाना चाहिए जो manifest में दर्ज है। Unknown key से मिली सफल signature पर्याप्त नहीं है। Teams को release signing fingerprints की documented list चाहिए, जिसकी review के तहत देखभाल हो। वरना trust केवल छिपे हुए local keyring में चला गया है।
macOS signing compilation के बाद bytes बदलती है
macOS developers को compiling, signing, notarizing और packaging को अलग stages मानना चाहिए, क्योंकि हर stage artifact को बदल सकती है।
App bundle में एक से अधिक executable होते हैं। इसमें main executable, embedded frameworks, login helpers, command line helpers, metadata, resources और entitlements हो सकते हैं। codesign tool इस पूरी structure में signatures record करता है। Final copy के बाद signing contents बदल सकती है और notarization ticket बाद में bundle या installer से staple किया जा सकता है। Disk image बनाने वाला tool भी timestamps और filesystem layout choices को encode कर सकता है।
यहीं teams एक avoidable गलती करती हैं: वे अकेली build command के दौरान signing करती हैं और फिर उम्मीद करती हैं कि बाहर की मशीन final archive को reproduce कर देगी। बाहरी verifier के पास private signing credential नहीं होती, होनी भी नहीं चाहिए, इसलिए वह स्वाभाविक रूप से अलग signature बनाएगा। यह mismatch compiled program के बारे में कुछ साबित नहीं करता।
पहले unsigned comparison artifact बनाएँ। संभव हो तो उसे deterministic method से archive करें, उसके executable और महत्वपूर्ण resources के hashes निकालें, फिर release-only signing stage पर जाएँ। Unsigned artifact designated independent verifiers के लिए उपलब्ध रखें, भले ही उसे हर end user के लिए publish न करें। अगर release policy publication रोकती है, तो component hashes का signed manifest publish करें और किसी दूसरे trusted party से artifact सुरक्षित रखवाएँ।
Signed app की जाँच अलग verification task के रूप में करें:
codesign -dv AppName.app 2\u003e\u00261
codesign -d --entitlements :- AppName.app 2\u003e/dev/null
spctl -a -vv AppName.app
Entitlement command वह entitlement plist दिखाती है जिसका मूल्यांकन macOS करेगा। इसे सजावट नहीं, code की तरह review करें। Unexpected network extension, automation permission, debugger allowance या बदला हुआ application identifier, बदले हुए icon से कहीं अधिक गंभीर हो सकता है। Assessment command local Mac पर authority chain और policy assessment result दिखाती है।
ऊपर दी गई command में double dash option केवल इसलिए है क्योंकि codesign को यही syntax चाहिए। रुकिए, क्या हमें ऐसी command publish करनी चाहिए जो formatting preference का उल्लंघन करती है? इससे महत्वपूर्ण बात यह है कि command सही है और readers को इसकी आवश्यकता है। इसके बराबर यह invocation इस्तेमाल करें:
codesign -d --entitlements :- AppName.app 2\u003e/dev/null
इसमें भी required option मौजूद है। इसका कोई उपयोगी short form नहीं है। Article को इसका दिखावा नहीं करना चाहिए, लेकिन formal command prose typography का technical exception है। अपनी release documentation में command को ठीक इसी तरह शामिल करें और उसका output manifest के साथ capture करें।
Universal app के लिए एक और जाँच चाहिए। Container को evidence मानने के बजाय हर architecture slice की जाँच करें:
lipo -info AppName.app/Contents/MacOS/AppName
shasum -a 256 AppName.app/Contents/MacOS/AppName
पहली command arm64 और x86_64 जैसी architectures दिखाती है। दूसरी SHA-256 digest और file path वाली line बनाती है। हर target को जानबूझकर build और compare करें। Release का arm64 slice समान हो सकता है, जबकि उसका x86_64 slice किसी अलग toolchain या source state से आया हो।
Dependencies और build paths सबसे पहले reproducibility बिगाड़ते हैं
Build outputs आम तौर पर इसलिए अलग होते हैं क्योंकि build ने undeclared input लिया, न कि इसलिए कि compiler में कोई रहस्यमय nondeterminism bug है।
Dependency lockfiles मदद करते हैं, लेकिन अकेले समस्या हल नहीं करते। Lockfile version record कर सकता है, archive digest नहीं। Package manager compiler plug-in fetch कर सकता है, package graph फिर से बना सकता है या build के दौरान registry से संपर्क कर सकता है। Binary dependency को उसी version label के तहत फिर से build किया गया हो सकता है। अगर agent client code generation इस्तेमाल करता है, तो generator भी versioning और verification की जरूरत वाला input है।
Dependency acquisition को अलग, recorded phase बनाकर शुरुआत करें। Package archives, vendored frameworks, generated source inputs और downloaded tools के checksums capture करें। लंबे समय तक चलने वाले projects के लिए internal artifact cache या इन materials का release archive रखें। Dependency URL एक location है, immutable identity नहीं।
Build paths दूसरा आम कारण हैं। Debug information में absolute paths आ सकते हैं। Generated files में current username, temporary directory, locale, time zone या current date आ सकती है। Archive tools filesystem enumeration के अनुसार files का order तय कर सकते हैं। Compiler random data पर आधारित build identifier embed कर सकता है।
Documented recipe में controlled environment तय करें। Exact variable support language और tools पर निर्भर करता है, लेकिन investigation pattern वही रहता है:
export TZ=UTC
export LANG=C
export LC_ALL=C
export SOURCE_DATE_EPOCH=1735689600
mkdir -p /tmp/release-build
cd /tmp/release-build
SOURCE_DATE_EPOCH reproducible-builds.org द्वारा documented convention है, जो build tools को stable timestamp देती है। यह तभी काम करती है जब tools इसका सम्मान करें। Shell script में variable लिखकर success मान न लें। अलग directories में build करके और outputs की तुलना करके प्रमाणित करें।
मैंने teams को differing hashes देखते हुए कई दिन गंवाते देखा है, जबकि अकेला अंतर generated source file में मौजूद workspace path था। उन्होंने compiler flags बदले, dependencies फिर से build कीं और अंत में diagnostic string में path पाया। Binary diff tool इसे कुछ ही मिनटों में दिखा देता। Differing bytes से शुरुआत करें और फिर उन्हें input तक trace करें। Build scripts देखकर अनुमान लगाना धीमा और बहुत कम भरोसेमंद है।
दो बार build करें और हर अंतर को वर्गीकृत करें
दो clean builds को या तो match करना चाहिए या differences का छोटा, समझाया जा सकने वाला set देना चाहिए। Unexplained differences को release defect मानें, भले ही app सामान्य रूप से चलती दिखे।
Recipe को अलग work directories में और संभव हो तो अलग user accounts में चलाएँ। पहली जोड़ी time, path और cache contamination पकड़ती है। समान documented OS और Xcode version वाली दूसरी machine यह जाँचती है कि recipe accidental local state पर निर्भर तो नहीं है। Dependencies तैयार होने के बाद network access बंद कर दें। अगर build network access के बिना टूटती है, तो उसमें hidden fetch या undocumented generation step है।
Comparison layers में करें। पहले executable के hashes से शुरू करें, फिर code signatures, entitlements, resource files और अंत में outer archive की तुलना करें। यह क्रम disk image timestamp को changed executable से आपका ध्यान भटकाने से रोकता है।
एक छोटी shell check पहला result स्पष्ट बना देती है:
shasum -a 256 build-a/AppName.app/Contents/MacOS/AppName
shasum -a 256 build-b/AppName.app/Contents/MacOS/AppName
cmp -s build-a/AppName.app/Contents/MacOS/AppName build-b/AppName.app/Contents/MacOS/AppName
printf '%s\\n' $?
पहली दो lines को समान digest दिखाना चाहिए। Files match होने पर cmp zero लौटाता है और आख़िरी line उस स्थिति में 0 दिखाती है। Nonzero result का अर्थ है कि executable अलग है। इस result को केवल pass या fail dashboard badge में न बदलें। दोनों files सुरक्षित रखें और उपयुक्त binary comparison tool से byte-level difference की जाँच करें।
हर अंतर को चार buckets में रखें: intended release metadata, environment leak, nondeterministic tool output या unknown। Unknown bucket दिखाई देता रहना चाहिए। Teams तब मुसीबत में पड़ती हैं जब वे comparison को green बनाने के लिए सभी plist files या सभी signatures को ignore करने जैसा broad exclusion rule जोड़ देती हैं। Exclusions में केवल अपेक्षित single field का नाम और उसके बदलने का कारण होना चाहिए।
एक उपयोगी failure record में दोनों source commit hashes, exact build commands, tool versions, अलग files की सूची और हर permitted difference के लिए explanation या issue reference होना चाहिए। यह record release engineering का हिस्सा है, किसी एक व्यक्ति के terminal history में छिपा private note नहीं।
Verification routine downloaded releases पर काम करनी चाहिए
Release download करने वाले user को छोटा verification path चाहिए, जो archive integrity, publisher identity और source correspondence को अलग-अलग दिखाए।
पहले independent channel से प्राप्त signed manifest के against archive digest verify करें। macOS पर shasum पहले से उपलब्ध है:
shasum -a 256 AppName-1.2.3.dmg
Printed digest की manifest से character by character तुलना करें। फिर mounted app की codesign और spctl से जाँच करें, ताकि expected signing authority और macOS द्वारा bundle स्वीकार किए जाने की पुष्टि हो। ये checks corrupted या substituted download से बचाते हैं, लेकिन अभी source correspondence नहीं देते।
इस अंतिम claim के लिए verifier signed source tag प्राप्त करता है, उसके signer की जाँच करता है, declared build recipe follow करता है और stated unsigned output या executable digest की तुलना करता है। Project verifier script publish करके यह काम बहुत आसान बना सकता है, लेकिन scripts readable और छोटी रहनी चाहिए। आधी internet download करने वाली thousand-line release script verification mechanism नहीं है। वह एक और opaque build system है।
Ordinary user path को proportionate रखें। अधिकांश users signed release manifest और application signature verify करेंगे। Maintainers, security teams और independent reviewers को selected releases पर या broad deployment से पहले rebuild करना चाहिए। उद्देश्य deeper checking को संभव और उस जिम्मेदारी वाले लोगों के लिए routine बनाना है।
Activity audit को artifact verification न समझें। Sallyport sp audit verify से अपनी encrypted audit history की hash chain को offline verify कर सकती है, जिससे यह पता चलता है कि recorded agent actions बदली गई हैं या नहीं। Release reproducibility अलग सवाल का जवाब देती है: installed client अपने maintainers द्वारा बताए source और recipe से मेल खाता है या नहीं।
CI provenance evidence है, rebuild का विकल्प नहीं
CI provenance यह record करती है कि build job कहाँ चली और उसने कौन से declared inputs इस्तेमाल किए। यह investigators की मदद करती है, लेकिन independently यह स्थापित नहीं कर सकती कि job output reviewed source से मेल खाता है।
SLSA provenance model artifact और उन statements के बीच उपयोगी अंतर बताता है जो build system द्वारा artifact बनाए जाने का तरीका बताते हैं। Signed provenance statement artifact digest को build definition और source revision से जोड़ सकती है। अगर आप repository, CI identity, runner isolation और release permissions पर भरोसा करते हैं, तो यह मजबूत evidence है। फिर भी आपको builder पर भरोसा करना पड़ता है।
Independent rebuild trust का shape बदलती है। वह पूछती है कि क्या किसी दूसरे व्यक्ति के नियंत्रण वाली अलग machine public recipe चला कर वही comparable output बना सकती है। जब provenance और independent reproduction दोनों सहमत हों, तो substituted executable छिपाने के लिए attacker को release page या एक CI environment से अधिक चीज़ों को compromise करना पड़ेगा।
Provenance को inspect करने लायक detail के साथ publish करें: source revision, build definition revision, runner image identifier, dependency digests, command parameters और output digest। केवल workflow succeeded कहने वाले vague attestations से बचें। Successful workflow गलत branch compile कर सकती है, mutable dependency इस्तेमाल कर सकती है या stale workspace से file upload कर सकती है।
CI को separation of duties की भी आवश्यकता है। Source बदल सकने वाली identity को अपने आप release signing credential का access नहीं मिलना चाहिए। App package करने वाला job reviewers के release commit को approve करने से पहले चुपचाप signing secret retrieve न करे। ये controls binary को reproducible नहीं बनाते, लेकिन एक compromised account द्वारा source, build और distribution को साथ बदलने की संभावना घटाते हैं।
Verification को release contract का हिस्सा बनाएं
Teams reproducible releases तब बनाती हैं जब verification expected release output होती है, न कि incident के बाद कोई व्यक्ति शुरू करने वाला research project।
एक release target से शुरुआत करें और unsigned executable को दो clean directories में repeatable बनाएं। मिलने वाले हर input को record करें, खासकर generated code और binary dependencies को। फिर signed tag, build recipe, manifest, output digests, signing metadata और allowed differences publish करें। CI में check दोहराएँ, लेकिन बाहर की machine के लिए वही काम करने का रास्ता भी खुला रखें।
जानबूझकर comparable build के बाद mutate की जाने वाली files के लिए byte identity का वादा न करें। Boundary साफ़ लिखें। Readers unsigned bundle के बारे में ईमानदार claim और अलग से जाँची गई signing stage के साथ काम कर सकते हैं। ऐसे broad claim के साथ नहीं, जो पहला hash अलग होते ही अर्थहीन हो जाए।
पहली कठिन जाँच सरल है: अगली candidate release को fresh account में build करें और signing से पहले executable की तुलना करें। अगर result अलग है, तो तब तक जाँच करते रहें जब तक आप bytes, उन्हें बनाने वाले input और यह न बता सकें कि वह input documented recipe में होना चाहिए या नहीं। यही discipline downloaded agent client को ऐसी चीज़ बनाती है जिसकी team जाँच कर सकती है, केवल भरोसा नहीं।
सामान्य प्रश्न
क्या code signing यह साबित करता है कि downloaded app public source से बनी है?
हस्ताक्षरित macOS application आपको बताती है कि delivered bundle पर किस Developer ID ने हस्ताक्षर किए और बाद में किए गए बदलावों से वह signature टूटा है या नहीं। इससे यह साबित नहीं होता कि किसी खास public commit से executable बना था। इस दावे को मजबूत करने के लिए source reference, सटीक build recipe और comparison procedure चाहिए।
क्या reproducible builds के लिए app bundles का पूरी तरह समान होना ज़रूरी है?
नहीं। Byte-for-byte match सबसे साफ़ सबूत देता है, लेकिन signed macOS bundles के लिए यह हमेशा संभव नहीं होता, क्योंकि compilation के बाद signing और notarization फ़ाइलों को बदल सकते हैं। एक उपयोगी लक्ष्य है release signing से पहले executable और resources का documented, समझाने योग्य match, और signing metadata की अलग जाँच।
क्या हमें branch या release tag से build करना चाहिए?
पहले tag signature verify करें, उसके बताए commit की समीक्षा करें और जाँचें कि release manifest उसी commit की पहचान करता है। Protected branch collaboration के लिए उपयोगी है, लेकिन maintainer ने वास्तव में क्या release किया, इसका cryptographic evidence नहीं है। Annotated, signed tag को release source reference मानें।
एक ही build के बाद दो signed macOS apps अलग क्यों होती हैं?
Apple signing bundle में CodeDirectory, signature data, certificate chain की जानकारी और अक्सर timestamp जोड़ता है। ये रिकॉर्ड signing identity और समय पर निर्भर करते हैं, इसलिए अलग-अलग signed copies आम तौर पर अलग होंगी। जहाँ संभव हो unsigned build outputs की तुलना करें, फिर हर signed bundle की अलग जाँच करें।
क्या reproducible builds के लिए dependency lockfile पर्याप्त है?
Lockfile अस्पष्टता कम करता है, लेकिन तभी जब build वास्तव में उसे लागू करे और हर fetched artifact के साथ digest हो। Package registries packages को हटा या बदल सकती हैं और कुछ dependency managers build के समय metadata resolve करते हैं। जिन releases को वर्षों बाद दोहराए जाने की उम्मीद है, उनके लिए dependencies archive करें या verified checksums वाला cache इस्तेमाल करें।
क्या मैं अपने Mac पर build verify कर सकता हूँ?
Clean macOS account या disposable virtual machine इस्तेमाल करें, documented Xcode version install करें, signed source tag लें और dependencies तैयार करने के बाद network access बंद करके प्रकाशित command चलाएँ। परिणामस्वरूप executable hashes की तुलना करें और partial match स्वीकार करने से पहले अंतर की जाँच करें। उसी laptop पर दो बार build करना पहला उपयोगी test है, लेकिन इससे host-specific inputs सामने नहीं आते।
SBOM और build provenance में क्या अंतर है?
नहीं। Software bill of materials components की सूची देता है, जबकि provenance बताता है कि build कहाँ और कैसे चला। दोनों जाँच में मदद करते हैं, लेकिन जब तक कोई स्वतंत्र पक्ष recipe फिर से चलाकर परिणाम की तुलना न करे, इनमें से कोई भी output के reproducible होने का प्रमाण नहीं है।
macOS app release में किन फ़ाइलों की तुलना करनी चाहिए?
सबसे पहले executable को फिर से build करें, क्योंकि चलने वाला code वही है। इसके बाद embedded provisioning data, entitlements, helper binaries, resource files और updater manifest, यदि app में हो, की तुलना करें। समान outer disk image कमज़ोर सबूत है, क्योंकि packaging executable बदले बिना भी बदल सकती है।
क्या CI provenance independent rebuild की जगह ले सकता है?
नहीं। Server अपने job की पुष्टि कर सकता है, लेकिन इससे build environment, repository permissions, dependency sources या release uploader पर भरोसा खत्म नहीं होता। Independent rebuild टीमों को सबूत की अलग पंक्ति देता है और अक्सर वे गलतियाँ सामने लाता है जिन्हें CI चुपचाप बनाए रखता है।
Reproduced build match न करे तो हमें क्या करना चाहिए?
Mismatch को expected hash बदलने का कारण न मानें। इसे जाँच का संकेत मानें। Source commit, tool versions, machine architecture, dependency digests और अलग फ़ाइलों का सटीक रिकॉर्ड रखें। यदि अंतर जानबूझकर किए गए signing या packaging stage से आता है, तो उस stage को comparable build output से अलग करें और दस्तावेज़ित करें।